
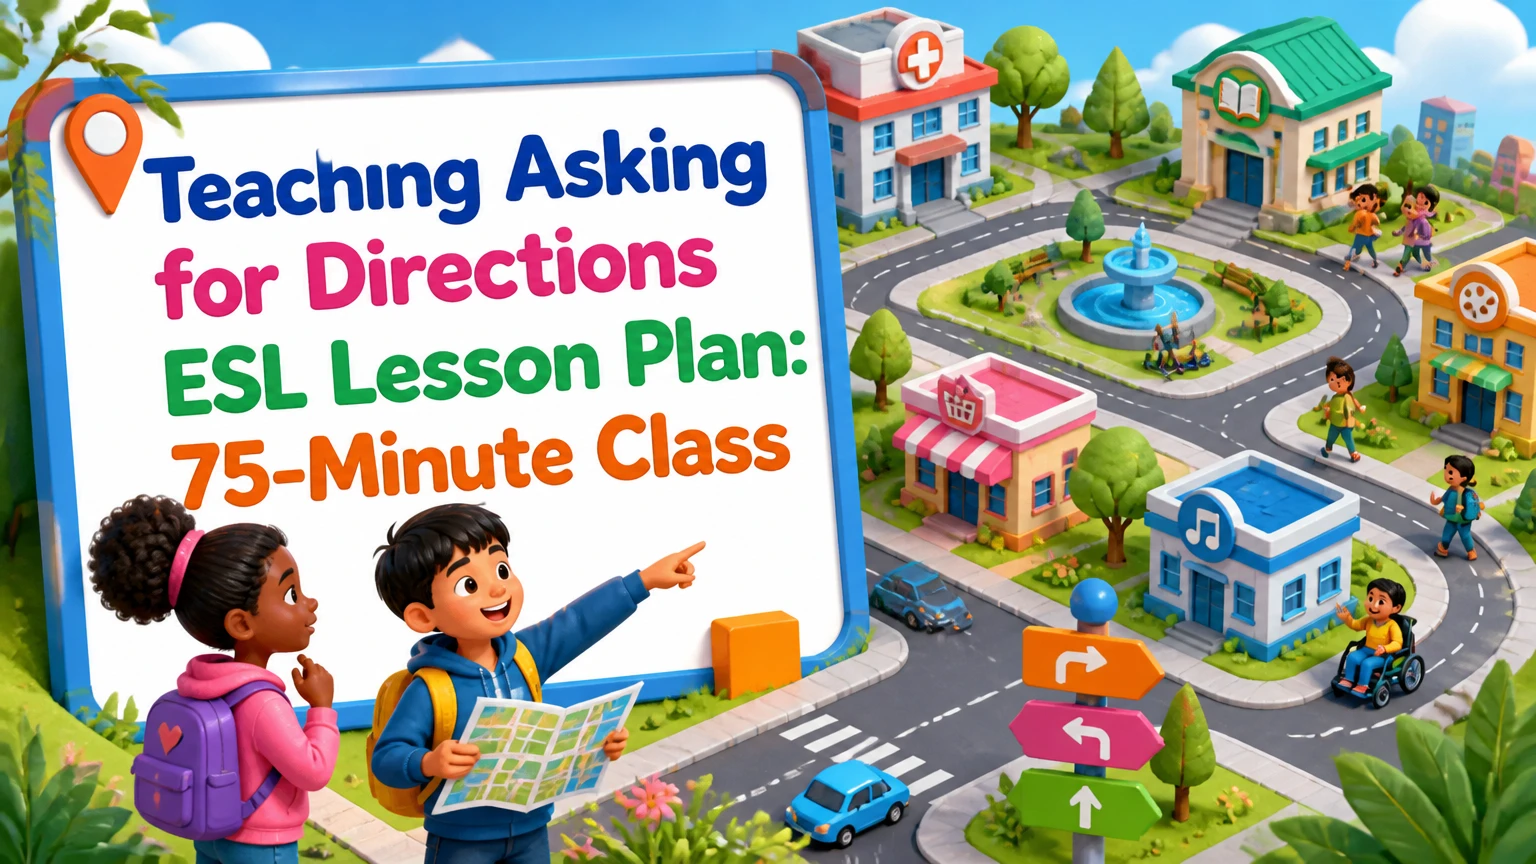
A teaching asking for directions ESL lesson plan helps A2-B1 learners ask for, understand, confirm, and give routes in English. This 75-minute communicative lesson uses a street map, the Presentation-Practice-Production sequence, controlled listening, an information gap, and role-play so students move from accurate phrases to independent navigation.
Key Facts at a Glance
Recommended level: A2 for the core lesson, with B1 extensions for landmarks, transit, and clarification.
Core outcome: Students can ask for a destination, give a route of three to five steps, and confirm arrival.
Standard duration: 75 minutes, expandable to 90 minutes or compressed to 60 minutes.
Best central activity: An information-gap map requires genuine communication because each partner has different information.
Typical preparation: 30-45 minutes, including map creation, worksheet preparation, and route checking.
Assessment target: Students complete a route with at least 80% accuracy and use one polite opener plus one confirmation question.
What Should Students Be Able to Do?
The primary lesson objective is functional communication, not memorizing isolated prepositions. By the end of the class, A2 learners should ask for a location, follow a short route, produce basic directional instructions, and repair a misunderstanding.
Use the following performance objectives:
- Students ask for a destination with Where is the library? or How do I get to the library?
- Students open an interaction politely with Excuse me, could you help me?
- Students give four route commands, such as go straight, turn left, and cross the street.
- Students describe locations with next to, opposite, between, and on the corner of.
- Students check understanding with Is it far?, Do I turn left at the bank?, or So I go past the park, right?
- Students reach the correct destination on a map without teacher intervention.
The lesson fits A2 because learners can use familiar places and simple present-tense questions. B1 learners can add approximate distances, public transportation, alternatives, and reasons for choosing one route.
Which Language Functions Matter Most?
Directions lessons combine several language functions. Asking, instructing, locating, checking, and closing an interaction should be taught as connected chunks because travelers rarely use a single vocabulary item in isolation.
| Function | A2 language | B1 extension |
|---|---|---|
| Opening | Excuse me, could you help me? | Sorry to bother you, I am trying to find… |
| Asking | Where is the museum? | Could you tell me how to get to the museum? |
| Starting a route | Go straight. | Continue along King Street for two blocks. |
| Changing direction | Turn left at the bank. | Take the second left after the traffic lights. |
| Locating | It is next to the hotel. | It is directly opposite the railway station. |
| Distance | It is near here. | It is about a ten-minute walk. |
| Checking | Is it far? | So I cross the bridge and turn right, correct? |
| Repairing | Sorry, can you repeat that? | Could you explain where I change buses? |
| Closing | Thank you. | Thanks, that is very helpful. |
What Materials and Setup Are Needed?
A paper street map is the most reliable core material because every student can mark a route, compare answers, and work without device or internet problems. Prepare one large projected map, one student map per learner, and paired A/B maps with different missing labels.
Before You Start
Time: 75 minutes, plus 10 minutes for setup and copying.
Difficulty: Moderate for an A2 class; easy to simplify for strong A1 learners.
Cost: Typically $0-$5 for black-and-white printing, or $5-$15 for color sets.
Materials: One map per student, one A/B information-gap sheet per pair, pencils, board markers, and six destination cards.
Class size: The procedure works from 4 to 30 students; pairs are more efficient than groups of four.
Prerequisite: Students should understand basic place nouns such as bank, park, school, station, and hospital.
Create a map with a rectangular street grid, four intersections, eight labeled buildings, a park, a bridge, traffic lights, and a clear starting point. Avoid diagonal roads in the first lesson because diagonal movement introduces unnecessary language such as northeast and southwest.
How Should the Teacher Orient the Map?
Tell students that the top of the page is north only if the map includes a compass. Otherwise, teach left and right from the traveler’s perspective, not the teacher’s perspective. Physically stand beside the map or point in the direction the traveler faces.
This distinction prevents a common classroom failure: the teacher gives correct instructions while facing students, but learners reverse every turn because they see a mirror image. State, “Imagine that you are standing at the red star,” and mark the traveler’s forward direction before modeling the route.
Step 1: Activate the Problem, 5-8 Minutes
Begin with a picture of a lost tourist, a station map, or a large street map. Ask, Where is the person? What does the person need? Who can help? Accept single words first, then reformulate useful answers in English.
Write I am lost and I need to find the hotel on the board. Do not introduce every vocabulary item during the warm-up. The purpose is to establish the communicative problem and identify existing knowledge.
Ask students to discuss these questions in pairs:
- Have you ever been lost?
- What place do visitors often ask for in your town?
- Do you usually ask a person or use a phone?
- What information makes directions easy to follow?
After two minutes, elicit places students already know. Circle destination nouns that will appear on the map. This creates a bridge between personal experience and the lesson task.
Success checkpoint: At least 80% of students can name one place and identify the problem.
Common mistake: Spending ten minutes explaining vocabulary before students have a reason to use it.
Step 2: Present the Route Language, 12-15 Minutes
Present language in functional groups, then model it on the map. Use arrows, colored lines, and gestures rather than translating every phrase. Students need to connect the phrase with movement and location.
Write this model dialogue:
Tourist: Excuse me, could you help me?
Local: Sure. Where do you need to go?
Tourist: How do I get to the library?
Local: Go straight along Park Street. Turn right at the bank. The library is next to the cinema.
Tourist: So I turn right at the bank?
Local: Yes, that is right.
Tourist: Thank you.
Local: You are welcome.
Teach the route as chunks:
- Go straight along…
- Turn left at…
- Turn right at…
- Take the first left.
- Take the second right.
- Walk past the school.
- Cross the street.
- It is on your left.
- It is on the corner of Pine Street and King Street.
Teach at for a reference point, as in turn left at the bank, and on for the side of a street, as in the café is on your right. Teach to after movement verbs, as in go to the station, but explain that go straight does not need to.
How Do You Teach Pronunciation and Intelligibility?
Directions become easier to understand when students stress the movement word and the landmark. Model TURN LEFT at the BANK and GO STRAIGHT past the PARK. The capitalized words represent prominent stress, not extra volume.
Use backchaining for longer phrases:
- the second right
- take the second right
- You should take the second right
- You should take the second right after the bank
Students then repeat while drawing an arrow. The physical arrow gives pronunciation practice a clear meaning.
Teach repair expressions explicitly:
- Could you say that again?
- Could you speak more slowly?
- Which street is that?
- Do I turn left at the hotel?
- How far is it from here?
A learner who can request clarification is more successful than a learner who only memorizes perfect routes.
Step 3: Check Meaning With the Map, 8 Minutes
Point to the starting star and say one instruction at a time. Students point, move a pencil, or draw an arrow. Check meaning with concept questions rather than asking, Do you understand?
Ask:
- If I turn left, do I go toward the park or the station?
- Is the library before or after the bank?
- Do I stop at the cinema?
- Is the hospital next to or opposite the school?
Use a short contrast drill:
| Phrase | Meaning on the map | Teacher check |
|---|---|---|
| Next to the bank | Beside the bank | Are the buildings close together? |
| Opposite the park | Across from the park | Is the park on the other side? |
| Between the hotel and café | In the middle of two places | Are there two reference points? |
| On the corner | At two intersecting streets | Does the building touch the intersection? |
| Past the station | Continue beyond the station | Do you stop at the station? |
Avoid teaching near, close to, beside, and adjacent to as equal priorities in a beginner lesson. Next to is more useful and easier to produce accurately.
Step 4: Listen and Trace, 10 Minutes
Give students a map with six numbered starting points and destinations. Read three routes twice at natural but controlled speed. Students trace each route and write the destination number.
Use this sample route:
“Start at the school. Go straight along Green Street. Turn right at the traffic lights. Walk past the bank. The museum is on your left, opposite the park.”
Read the route once without pauses. Read it a second time in meaningful chunks. Students compare answers in pairs before you display the route.
The task tests listening, spatial processing, and vocabulary simultaneously. It also shows whether a learner understands past, opposite, and on your left, rather than merely repeating them.
Success checkpoint: Students trace at least two of three routes correctly.
Common mistake: Reading each phrase unnaturally slowly, which creates listening conditions unlike real interaction.
Recovery: Repeat once with chunking, then let students ask one clarification question.
Step 5: Complete the Dialogue, 7 Minutes
Give students a dialogue with eight gaps. The word bank should contain more items than necessary so students must use meaning, not position.
Word bank: opposite, straight, help, right, far, next to, repeat, second
Tourist: Excuse me, could you ___ me?
Local: Of course. Where do you need to go?
Tourist: How do I get to the post office?
Local: Go ___ and take the ___ right.
Tourist: Is it ___ from here?
Local: No. It is ___ the library, ___ the bus station.
Tourist: Could you ___ that, please?
Answer key: help, straight, second, far, next to, opposite, repeat.
Students first complete the worksheet individually, then practice the dialogue with a partner. Require the local to point to the route while speaking. This keeps the activity connected to meaning.
Step 6: Run the Information-Gap Map, 15 Minutes
The information-gap activity is the central practice because Student A and Student B possess different information. Each learner must ask questions and listen carefully, since looking at the partner’s map would remove the communicative need.
Give Student A a map with the library, hospital, and café labeled. Give Student B the same map with the station, museum, and post office labeled. Both maps contain blank buildings where the partner has information.
Set these rules:
- Do not show your map.
- Ask for one missing place at a time.
- Repeat or confirm if the route is unclear.
- Draw the route while listening.
- Switch roles after three destinations.
Provide a language frame for less confident learners:
A: Excuse me. Where is the ___?
B: Go straight. Turn ___ at the ___. It is ___ the ___.
A: Do I turn ___ at the ___?
B: Yes, that is right.
For B1 learners, remove the frame and add a blocked road, a longer route, or two possible destinations. Ask them to explain which route is faster and why.
Teacher monitoring priorities:
- Did the speaker identify a starting point?
- Did the speaker use a landmark?
- Did the listener confirm the turn?
- Did both learners exchange information?
- Did pronunciation make left and right intelligible?
Do not interrupt every error. Record examples under clear, needs correction, and interesting alternative for delayed feedback.
Step 7: Produce Directions in Role-Play, 10-15 Minutes
Turn the classroom into a travel situation. One student becomes a visitor arriving at a station, and another becomes a local, hotel receptionist, police officer, or shop worker. Give each visitor a destination card and each local a map.
Sample cards:
- Find the nearest pharmacy.
- Get from the train station to the hotel.
- Find the museum without crossing the bridge.
- Reach the hospital using public transportation.
- Ask for directions, misunderstand one step, and request clarification.
The visitor must use a polite opener, ask a complete question, listen, confirm one detail, and thank the local. The local must give a route with at least three steps and one landmark.
Use a simple performance rubric:
| Criterion | 0 points | 1 point | 2 points |
|---|---|---|---|
| Opening and question | No understandable question | Partial question | Polite, complete question |
| Route sequence | No route | One or two accurate steps | Three or more accurate steps |
| Location language | No location phrase | One partly accurate phrase | Accurate landmark or preposition |
| Interaction repair | Gives up | Repeats with prompting | Independently clarifies or confirms |
| Intelligibility | Frequently unclear | Meaning usually recoverable | Left, right, and landmarks clear |
A score of 7 out of 10 indicates the core objective is met. A score below 5 suggests the learner needs another controlled map task before free role-play.
Step 8: Give Delayed Feedback and an Exit Ticket, 5-7 Minutes
Write anonymous examples from the role-play on the board:
- Go to bank and turn right.
- The café is next the hotel.
- Take second left.
- Where I can find the station?
Ask pairs to correct the sentences. Expected revisions are:
- Go to the bank and turn right.
- The café is next to the hotel.
- Take the second left.
- Where can I find the station?
End with an individual exit ticket. Give each learner a starting point and destination on a miniature map. Students write two directions and one clarification question, then read the route to a partner.
The exit ticket separates speaking confidence from actual language control. Keep it for the next lesson grouping decision.
Which Directions Lesson Format Should You Choose?
Paper maps suit first lessons and classes with limited technology. Digital maps provide authentic visual navigation, while transit maps add high-value vocabulary but increase cognitive load and local knowledge requirements.
| Format | Level | Setup time | Main language | Main limitation |
|---|---|---|---|---|
| Paper street map | A2 | 30-45 minutes | Turn, go straight, next to | Less authentic for phone users |
| Digital map | A2-B1 | 15-30 minutes | Pin, route, block, entrance | Device, privacy, and Wi-Fi issues |
| Street-view task | B1 | 20-40 minutes | Traffic lights, crossings, landmarks | Visual detail can distract learners |
| Public transit map | B1 | 30-45 minutes | Transfer, platform, line, fare | Dense symbols and local terminology |
| Classroom city grid | A1-A2 | 10-20 minutes | Left, right, forward, stop | Physical space may be limited |
When Is Google Maps Useful?
Google Maps is useful after learners can already understand basic route language. A teacher can share a map of London, New York, or the students’ own town, place a starting pin, and ask learners to guide a partner to a named destination.
Google Maps is not ideal for the first presentation. Real streets contain construction, multiple entrances, one-way systems, street-view changes, and visually similar landmarks. Those features create authentic difficulty, but they can overwhelm A2 learners before the core chunks are established.
Protect privacy by using public landmarks rather than a student’s home address. Download screenshots if internet reliability is uncertain.
When Should You Use a Transit Map?
Use a transit map for a B1 extension or a needs-based travel lesson. Teach take the number 4 bus, change at Central Station, get off at the third stop, which platform, and how much is the fare?
Transit directions require more than movement language. Learners must interpret lines, symbols, transfer points, schedules, and sometimes regional vocabulary. Give students one route first, then ask them to compare a faster route with a route requiring fewer changes.
How Can You Adapt the Lesson for Different Learners?
Level, class size, delivery mode, and mobility needs determine the best adaptation. Keep the communicative objective stable, but change map complexity, sentence support, route length, and response mode.
| Situation | Adaptation | Route length | Teacher priority |
|---|---|---|---|
| A1 beginners | Use arrows, gestures, and sentence frames | 1-2 steps | Left, right, straight |
| A2 general class | Use landmarks and information gaps | 3-4 steps | Accuracy plus interaction |
| B1 travelers | Add distance, alternatives, and transit | 5-7 steps | Clarification and fluency |
| Online one-to-one | Share one map and use annotation tools | 2-5 steps | Screen orientation |
| Large class, 20+ | Pair rotations and numbered maps | 3-4 steps | Student talking time |
| Mobility-sensitive class | Use seated maps and verbal simulation | Any length | Equal participation |
For online teaching, share a map and let the learner annotate it with arrows. Turn off screen control while the student listens, then ask the student to explain the route back. This exposes misunderstandings more clearly than having the teacher move the cursor.
For a large class, prepare four destinations and rotate partners every three minutes. Give fast finishers a blocked street or an incorrect route to correct. Give slower learners color-coded arrows and a phrase bank.
For a one-to-one lesson, use a map of the learner’s upcoming travel destination only after checking that the map is readable. Personal relevance increases task value, but a local map can introduce names and landmarks that are harder to pronounce than the target language.
What Are the Most Common Problems?
The most frequent directions errors involve orientation, articles, sequence, prepositions, and excessive detail. Correct the error that blocks successful navigation first; minor grammar errors can wait until the route is understood.
| Problem | Likely cause | Immediate fix | Follow-up practice |
|---|---|---|---|
| Left and right reversed | Mirror orientation | Mark traveler direction and use the left-hand L gesture | Four-turn physical drill |
| Go to bank | Missing article in a memorized chunk | Color-code the bank | Dialogue substitution |
| Turn on the second right | Preposition confusion | Contrast at a landmark and on a street | Map concept questions |
| Route has ten steps | Learner translates every detail | Apply the three-step rule | Chunk routes into checkpoints |
| Student says nothing | Fear of public correction | Provide a frame and rehearsal | Pair repetition before role-play |
| Partner gives route too quickly | Unequal fluency | Require one phrase per map arrow | Timed but repeated exchanges |
The rule of three is a useful practitioner constraint: novice speakers should normally give three core instructions, then pause for confirmation. Longer routes should be divided into checkpoints such as at the bank, after the bridge, and opposite the park.
A second expert rule concerns map design. Every route should have one unambiguous answer during controlled practice. If two roads lead to the same destination, students may produce different but valid answers, making language errors difficult to diagnose.
A third rule is to assess intelligibility before grammatical perfection. A learner who says turn rite but communicates the correct turn may need pronunciation work, while a learner who produces an accurate sentence but reverses the route needs spatial practice.
How Much Time and Money Should Teachers Plan?
A typical teacher needs 30-45 minutes to adapt a map and create route cards for the first class. Reusing the same map with new destinations reduces preparation to approximately 10-15 minutes for later lessons.
| Resource | Typical quantity | Typical cost | Reusable value |
|---|---|---|---|
| Black-and-white maps | 15-30 copies | $1-$3 | 1-3 lessons |
| Color map set | 15-30 copies | $4-$15 | 3-8 lessons |
| Teacher-created cards | 12-24 cards | $0-$2 | 10+ lessons |
| Digital map screenshots | 4-8 images | $0 | 3-6 lessons |
| Commercial worksheet | 1 license or pack | $3-$8 | Depends on license |
Commercial resources can save preparation time, but teachers should inspect whether the map has clear scale, readable labels, culturally appropriate places, and routes that match the stated level. A visually attractive worksheet cannot compensate for ambiguous directions.
What Should Students Do After the Lesson?
Real-world transfer should occur within one week. Ask learners to record a 30-second voice message giving directions from a familiar landmark to a useful destination, or to write instructions for a visitor arriving at a station.
Useful follow-up tasks include:
- Photograph a public map and label five locations in English.
- Write a route using first, then, after that, and finally.
- Ask a classmate to follow the route without seeing the original map.
- Compare walking and public transit routes.
- Rewrite unclear directions after receiving listener feedback.
Do not require students to use live location sharing. A screenshot or fictional map provides the same language practice without privacy concerns.
FAQ
Is Asking for Directions Suitable for Beginner ESL Students?
Yes, asking for directions is suitable for beginner ESL students when the route contains one or two turns and the teacher supplies sentence frames. Start with Where is the bank?, Go straight, and Turn left. Delay distance, transit transfers, and complex landmarks until students can follow a short route accurately.
What Is the Best Game for Teaching Directions?
An information-gap map is usually more effective than a competitive directions game because partners need different information. Students must ask, listen, confirm, and draw a route. A mystery-destination variation adds motivation: one learner gives directions while the other identifies the hidden location.
How Do You Teach Left and Right in ESL?
Teach left and right from the traveler’s viewpoint, mark the starting orientation, and use a physical gesture such as the left hand forming an “L.” Begin with stationary turns, then move to two-step map routes. Avoid rotating the map during early practice because changing orientation increases unnecessary cognitive load.
Should Students Use Imperatives or Modal Verbs?
A2 students can begin with imperatives such as turn left and go straight because the forms are short and functional. B1 learners should add softer forms such as you should turn left, you need to cross the street, and you could take the bus, especially when giving advice or alternatives.
How Do You Teach Directions Online?
Share a simple map, annotate the route with a digital pen, and hide the destination from the learner when testing comprehension. Ask the student to repeat the route while the teacher remains silent. Screenshots are safer and more reliable than live street navigation when internet access, privacy, or visual complexity is a concern.
How Can I Assess a Directions Lesson?
Assess five observable behaviors: a polite opening, a complete destination question, three accurate route steps, one location phrase, and a confirmation or repair expression. A 10-point rubric gives two points for each behavior. A score of 7 or higher indicates functional success, while lower scores identify the language or listening support needed next.
The Bottom Line
A strong teaching asking for directions ESL lesson plan moves from a clear travel problem to controlled map listening, an information gap, and independent role-play. Plan 75 minutes, use a simple paper map first, teach language as functional chunks, assess route success with a short rubric, and add digital maps or public transit only when the basic interaction is secure.


